The other day, my mom and I were going to Supercuts right after school to get Imran's hair cut. Before we entered the hair cut store, we actually went to the store right next to it, which happened to be Jewel. If any of you know me, you may know that I LOVE Arizona tea. It's just so cooling and refreshing with the perfect tint of fruityness! My favorite are Peach Green Tea and Half Mango, Half Tea. How about you? So we picked up some Arizona and some 66 cent Warhead jelly beans.
Normally the jelly beans wouldn't be priced so low, but with Easter just passing, everything is super inexpensive! So if any of you are looking for some sweets to buy, I urge you to look in that section.
Anyways. so afterwards we stopped at the Supercuts next door. While Imran got his haircut, I looked around the dainty little shop for some hair products. I wasn't looking for anything in particular, but I knew that Supercuts always have the most amazing sales so it was fine by me to spend the time looking around. Supercuts always has great deals at the counter - up to even 60% off!
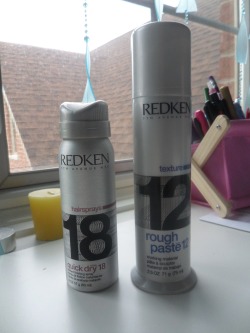
I was debating between getting this box of Redken products ($5) or a shampoo and conditioner full-sized Paul Mitchell- ginger scented ($10). Even though the Paul Mitchell products were of great value, I absolutely despised the smell. Plus, I decided to look for conditioners and shampoos that are Sulfate free so they don't damage the hair, but the Paul Mitchell product did have Sulfates, which is why I left it behind.
The box of Redken products was situated on the counter claiming that it was $18, but now is $5. With this value, I purchased the products. I've been absolutely enjoying some of the items. While I haven't used the hair spray yet, I used the texture cream and it was really interesting. I found it so cool how the texture cream comes out of the tube with the easy move of the nozzle.
So here was my small purchase/mini haul. If you're interested in a deeper review of these products, just shoot me a message!
I was recently inspired by another blogger to carry an agenda with me. The ones the school had were so drab and I always forgot to write in it.
So when I was digging through my closet, I found a Kate Spade personal planner. I remember I got it back in 5th grade when I stacked up "Ahern Bucks" for doing good things or answering questions. Basically, we could spend that money on things we want at the end of the year that my teacher supplied. See, the thing is, that I'm pretty surprised that I picked this up. Nonetheless, I'm super happy! This even came with extra fillers for notes and to-do lists. So basically this was around 5 years old when I got it since the calendar was from 2000, but it didn't look used at all. Maybe someone gave it as a gift to her and she thought her students would like it since she doesn't use it. I searched it up online yesterday and apparently the one I have is the first authentic Kate spade planner. It ranges from $40-$80 online still and originally retailed for $200. I wonder how much it cost when I got it. I still can't believe that my teacher just gave this expensive item to her students, but am really happy to have it.
The colors inside are bright- with the tabs and pens I use. Plus, it has cute little pictures of purses, etc! I can actually see myself use this because I'd be motivated to use something so pretty unlike my school agenda. I'll be using this planner for everything- not just school.
Unfortunately I only have the monthly planner for 2000 and when I searched it online, the refills themselves are around $28. Way too expensive! And I'm also convinced that Kate spade purposely makes other refills incompatible with this so we'd have to buy Kate Spade ones. I guess I'll just finish up the ones from 2000 and just change the dates until the end of the year.
Oh and I also organized my backpack=everything in the right folders.
I know this is a late post, but I found these pictures on my phone and decided to talk about it! Every once in a while (if there is good weather, really) we walk to a food store at our nearest intersection and treat ourselves to something nice. A week ago, Imran and I decided to go to Red Mango.
Red Mango is delicious! I got a pomegranate yogurt with some strawberries, fudge, and mochi. Imran says the fudge is too chocolatey for him, which surprises me because usually he's the one who eats the chocolate and I'm the one who thinks things are too chocolatey. I felt that the chocolate balanced out with the rest of the stuff I had in my yogurt, so it was fine. :)
If you haven't tried mochi, I urge you to do so. It has no gelatin in it (it's derived from rice) and is really chewy! And of course I got strawberries because I LOVE THEM.
On the way back home we saw this sign. I suck at politics and candidate things, so I have no idea who Ron Paul is. Still, I thought it was really neat that they flipped around the evol in revolition to make it seem like LOVE is in the word!
All in all, I just wanted to mention how much I enjoy walking with him. Sometimes we're pretty bitter with each other so it's a great change. We're both silly with each other, and have a good time. Love you Immy!
The other day, my mom picked these up for me while my brother was getting a hair cut.
Now I just want to start off by pointing out that Supercuts is totally trying to attract women to their store with these bags full of men and wonderful cuts. And it's working.
Anyways, one of the items my mom purchased was this:
It's the Paul Mitchell Super Skinny Relaxing Balm. She got it around $2-$3 since it was on a HUGE sale at Supercuts. I tried it once or twice and was satisfied with it. It's pretty much a two-in-one product for those girls with frizzy hair like me. You can tame some of the frizz and blow dry it at the same time (since it works as a heat protectant). I skipped out on blow drying for a long time, but started getting back into it so I was thinking about getting a heat protectant anyways for my hair. Yay, mom!
I like how it has a pump at the top and the smell is okay. It just doesn't mix with my shampoo sent real well, so I'm glad that I'm getting a new, different shampoo soon anyways.
My mom also got me this shatter polish:
The pink color of this was dedicated to Breast Cancer Awareness month - cute color! And the bottle was $3, which is pretty cheap compared to the normal price ($8.50).
I don't know why, but my mom has been purchasing a lot of OPI shatter polishes for me. I don't even have any opaque colors of OPI... just shatter. Haha. And the sad part is that I don't really enjoy shatter. Sure, it's cool, but when I have the time to do my nails, I'd paint designs on them rather than skipping out with this.
Also, I personally have a grudge against shatter polishes. I had my other ones for about 2 months and kept them sealed tightly. Looked back on them the other day and the black and white were as hard as a rock. The only ones that stayed *OK* were the red and blue ones, which I cared for less compared to the other two *le sigh*. I don't believe I've used one of those shatter polishes on all my nails before besides one time with the black and once with the white. Since I only wore the red polish on my left hand once to test it out, I decided to send it to my cousin in Pakistan along with a goody bag full of other girly items.
I might buy some nail polish thinner to fix this, but I'm not sure if it'll work. I'll try to use this pink one for once before it dries out too.
But I'm still thankful for my mom getting me this. She was so excited to give it to me- it was so cute :3
So my recent addition of fairy lights made me really excited about my room- I HAD to take pictures of it! Plus, I cleaned my room, which is a once in a month occurrence, so this was a pretty big thing to me. :)
Anyways, I took a couple of pictures of my bed, dresser, desk, and new fairy lights.
So here's my bed. I know, everything is so girly! I love it and dislike it at the same time. At one point I want a simplistic room with white walls and bright or sophisticated colors as accents. But at another point, I love everything that I put in this room and don't want to change. My fairy lights make the bed look like it's almost on fire teehee.
And here's my end table. The table itself didn't come with the bedset from Ikea. My parents felt that it wouldn't hold well on my carpet and keep falling over. As much as I wanted that instead, I'm still happy with this. I kept the items on here simple and clean- just some books/magazines/my art sketchbook and a cute little curli-que decoration. My alarm clock has had those butterflies since I was in 6th grade, but I still love it that way. :) Oh and that glass was there because I like to drink water before I go to bed.
And here are just some more pictures of my fairy lights. They light up the darkness so well in my room. I feel so comforted when I sleep with them on. They're so whimsical- I love it! At first I was going to put white ones up, but I couldn't find any in my house so I put these up. I'm pretty happy with them nonetheless.
AND HERE COMES THE DESK. I used to have this desk situated perfectly in my closet. It fit so well and I thought it was pretty nice that I could pretty much close my closet door on myself hahah. I got tired of it though, so I decided to move it back to my original location in front of the window. It's so distracting to have the shades open when I work (because I tend to just stare outside), so I just keep them closed for the most part when I'm working. I decorated my window with these girly hanging beads or whatever you call them. I purchased them from JCPenny if anyone is interested. I also got this fabric to hang up, which gives it more character.
These are just some items on my desk. There's a pink board with magnets on the left and a cup of gel pens for sole decoration. I don't really put any notes with the magnets and the gel pens don't work anymore - don't tell! On the right I have a little mini-hamper filled with a bunch of pens and pencils to use while I work. Since I use nail polish so much while sitting on this desk, I also put my box of nail polishes here. I used to have this cool swivel thing that I got from a Starbucks gift that I stored nail polishes in, but my polishes didn't fit them anymore so I'm just using this storage as decoration until I get some more drawers to use.
I put some candles by the edges of my window - I got a 4 pack of these citrus candles that I refuse to use because the color is so pretty. I think the other smaller candles were from Ikea - the white ones and the purple glitter. The white used to actually be pink because I melted the wax and put food coloring in it, but the food coloring evaporated some how leaving it a bit lighter pink everyday.
On the right of my desk is this bookshelf. It's pretty messy, which bothers me because everything else is clean, but I'm too lazy to clean it up. I basically just have a red picture frame with the sample picture it came with from Ikea. I got it when I was small, so I don't know the price. The bookshelf is from Ikea as well - pretty much every major structure and mirror in my room is from Ikea if you want to know. The bookshelf just has some of my candles and a little vase on it, along with some Sunday School trophies and obviously books. On the bottom shelf is all my crafty clay items.
This is my dresser, which I adore because of it's simplicity. On the left of it, you can see a blue container that I store some of my other art supplies in. The markers and color pencils are in a drawer of the dresser though. On the top left you have a little peak at my pink dry erase board, too.
Here are just some of the items I have on my dresser. I have a little stand that holds all my bangles (churiya, really). In the middle, I have a little jewelry box that I got as a gift - very Vera Bradley-esque. I also have a little heart bowl to keep any extra things in there. On the right I just kept some of my products that I use often. The rest are either in my bathroom or drawer. If you want to know about any of the products, don't hesitate to ask.
And here comes the end of our journey around my room - the corner between my bathroom and closet doors! I bought this circle chair from Walmart for around $25. I was actually eyeing a bigger one with better quality for $30 from Target, but they stopped keeping it in stock in store. :\ On my walls I just kept a painting I made in 6th grade and a bulletin board. I usually just put pamphlets of events and other cards that I get on there to sort of express what I've done for a while. I also have a little towel that expresses the 50th anniversary in our school and my 8th grade graduation tassel. That blue pillow is actually an ipod speaker, but it sucks. Still, it's pretty soft and I love the color. I also have a little scrunchy pillow from 5th grade that I bought at a fair at our school for $4 and a build-a-bear from my friend's birthday party.
And there you go! A detailed tour of my room. Sometimes it almost seems like I'm living in some cotton candy land because of the colors. If you want to know what my bathroom is like too (I decorated it), let me know. I just wanted to document this amazing moment when my room is actually clean, really. If you have a room tour on your blog, I'd love to see!
Chevron nail art! << Did you know that zigzags have an actual professional name? I didn't.
Anyways, this was super easy to do - I just used my thin nail art brush and made some zigzags of different colors on top of a white base. Nothing too fancy. It was getting dark so I quickly shot a picture without having a top coat or cleaning up the edges, but you know how it is. I hope to get better at this design and do it in more springy colors!
So I found a couple of cute clothing websites today while surging through the web. This one was probably the most well-known out of the bunch, and I knew that there's probably an Urban Outfitters near my home.
I never thought about going to Urban Outfitters - when I thought about it, I always felt that it was a little too hipster for me. Even though I had to pick and choose on that blog, I still really adore the things I found.
I'll start off with the more eclectic and unique things that I thought were pretty cool! :) I'd totally impulsively buy them. Be forewarned, my friends.
By the way, I'd just like to tell you how cute the website is. The design is very edgy, yet simple. Love it!
Oh and I tried to find things overall within a certain price range for those who don't want to spend too much. I'll update this post soon with a link and price!
I thought this was pretty clever, considering you just clip a bow on your hair! Probably won't work for a girl who has hair texture like me, but for girls that don't have frizz, it'd be pretty cool and practical.
The bag at the top right corner is very unique. The fact that it looks like a tux with pink details makes it so cute and eclectic.
The lace fan... *swoon*. It looks so pretty! Someone tell me that these aren't really cute and possibly seductive. I dare you.
DO YOU BELIEVE THIS IS LIPSTICK?! I find it so funny/cute that there's a little cat on the end! The color is pretty, too. However, I don't see myself ever using this baby- I don't wear lipstick anyways and would hate to ruin the cute cat! And it'd probably be a bit hard and uncomfortable to apply with the ears and all.
I've been meaning to get a pair of everyday studs. I'm not really a pearl person so I don't wear the ones I have much. Although I'd love to have some (faux even) diamond studs, I thought these were pretty cute too. I'd totally wear the hear or stars ones everyday, and can see myself using the moon and stars together while mix-matching.
I think these feather earrings are pretty and sophisticated. Don't know if they'd suit me well enough, though!
The last two pictures are of the same things. I love the threaded bracelets - the color combinations are a little out there, but I still think they're pretty cute! And they give 6 other gold bracelets as well.
I've been wanting a watch for a while- specifically the Michael Kors watch that I have a picture of on the bottom right. Isn't it beautiful? I think it'd go with a lot of outfits because of the rose-gold color. The name is Michael Kors Rose-Gold Baguette watch, but it's so expensive! I'd never get my hands on a $300 watch like that.
So I started looking for some alternatives and found a couple of watches on Urban Outfitters. I thought the mustache one was pretty unique and cute! It's a bit simple though for my taste, but nice nonetheless. :)
There was also this typewriter-style watch. It can come in a variety of letters. If I were to get it, I'd get 'h' of course. :) It's also a bit simple like the mustache watch.
The next two are the same types of watches, but different colors. The floral design adds a cute feminine touch!
The next one is the one im COMPLETELY IN LOVE WITH. It was originally priced $50 but only online its $15. It comes with two bands- the white and blue, and has 3 beveled edges. The two on the bottom right of the picture seem to have some rhinestone border, while the other one on the watch has a nice design. I want this so bad!!
I've always wanted a beanie. They seem so effortless and cute. They could also hide up some strands of hair that I'd get frustrated with when I try to keep my hair down. I like this color, but I have nothing for it to go with. I'd probably choose a light brown or creme color instead. :). I found out how to sew these together too, so I might do a tutorial for a pink one (it's refashioning out of an old sweater!).
These umbrellas come in a variety of trims. I chose blue here to make it clear how the trims look. I'd probably get a white trim or maybe even this one (depends) and decorate the inside with cute drawings by a sharpie marker. The sharpie wouldn't fade off especially since there's no water hitting it- it's a cute idea. :)
And that's it from what I found to like on Urban Outfitters! I'm sure I could look into clothing and other accessories, but it became a bit time consuming. Have you every shopped at Urban Outfitters? What'd you get and how do you like the store? :)
So instead of doing my English research paper, I decided to spend my day baking a cake. It was well worth it in my opinion. :)
I had originally started off making just some Devil's Food cake for my brother using those Betty Crocker mixes, but then I decided create this layer cake with my 9" pans I've never used before even though I had it for a couple of months. To be honest, I was scared that I wouldn't be able to bake a two layer cake, 'cause last time the cake broke into pieces (I was uneducated in baking enough to not know that it would fall apart easily when fresh out of the oven).
So I finally watched a couple of Youtube videos and just followed those for help. The one I used to follow basic steps in was this video:
I didn't really use the water spray though. It seemed like a good idea, but it wasn't necessary for me since my cake was already pretty moist! She also has her own blog, Veronica's Cornucopia.
Here's the recipe! :)
Devil's Food Cake with Chocolate Cream Cheese Frosting (Chocolate on Chocolate, as I call it)
1. Just follow the cake mix (I used Devil's Food, as mentioned earlier) and split the batter in half. My brother decided to help me out and mix the batter for 30 minutes even though I already mixed it in the mixer. LOL.
2. To prepare the two 9" circular pans you will use, I suggest to brush some Miracle Pan Release that Veronica had given a recipe on.
3. So pour each half into two 9" circular pans.
4. Once baked, let cool for 15 minutes.
5. Release the cake from the pan onto the splatter guard. The reason why you'd put it on the splatter guard first is to protect the dome created when the cake baked. It prevents it from cracking in half, since the cake is fragile when warm. The Miracle Pan Release worked AMAZINGLY. The cake easily fell onto the splatter guard without any utensil/knife to push it out!
6. From the splatter guard, flip it onto a cooling rack.
Tip: If you don't have a real cooling rack like me, remove one of the racks from your oven before baking your cake and balance it on a book. It's great alternative!
7. Let the cake cool and then wrap it in saran wrap to store it in the fridge for at least 30 minutes.
8. Once you take it out of the fridge, take out a large bread knife and cut the domes off both of the cakes. Having a flat top will make it easier for you to stack the layers and will make it look more appealing. Keep the excess cake aside to use for cake pops later! ♥
9. Now, it's time for your frosting. I made my frosting ahead of time- I used the frosting recipe from here. All you have to do is take a dollop and spread it on top of one of the layers. Spread enough to make it a thick layer, but not too much. Take the other cake and flip it over quickly onto the initial cake with the frosting to create what I have in this picture:
10. Apply frosting on the sides first. I used a butter knife and my bread knife to spread the frosting out as smooth as I can. It's obviously not going to be as smooth as fondant, so don't be mad that it's not perfect! I got a little aggravated myself, but I had to get over the fact that it wouldn't be perfect.
11. Drop some frosting on the top and spread it out. Keep going back and forth between smoothing the sides and the top to have a smooth, all around cake. I did have to remove some frosting back into the mixing bowl, so keep that around.
12. Once done, it's time to decorate! I was originally going to keep it plain, but I decided to use even more chocolate. :) I pretty much took an unsweetened chocolate baking bar, heated it up for 30 seconds to get it a little softer, and used a vegetable peeler to make some chocolate curls. They didn't turn out as curly because the chocolate was still relatively colder than it should have been. I pushed them on the edges of the top and bottom of the cake because I ran out of frosting to pipe anything, but still wanted a cute border.
13. Peel a couple of larger chocolate curls and arrange them like a flower in the middle.Be careful with these curls because they break REALLY easily. I used a skewer to pick them up or my fingers if I was careful enough. For the bottom border, I ended up just dumping some on my cake stand and pushing them into the cake (I was lazy... what can I say. :) ).
14. Melt some of the extra unsweetened chocolate in the microwave and put it into a ziplock bag. Snip the corner and pipe out some flowery designs on the top. On the sides, you can just do some messy waves like I did, if you want.
15. TADA! AND YOURE DONE. Just let the chocolate cool a bit before you cut into it. My family and I are eating the cake at this moment and they loved it! So much better than just baking a sheet cake of the Devil's Food cake - looks prettier, tastes great!
They think it's really chocolatety, so if you're not a chocolate lover, then try a white buttercream frosting instead. :)
"I hope your fire... fire burns babay." -message from Nicki Minaj relayed by my brother
Hope you liked this post and try out this cake! Tell me what you think!
Hey guys!
So here's a super easy DIY that I know all my girlies will love. Instead of purchasing already-made, more expensive heart paperclips, why not make it at home in a matter of seconds?
So here's what you need: A paperclip and a long-nosed plier. You don't need a paperclip that large or colorful either. You also don't have to have a long-nosed plier. I've done it with my nails/finger plenty of times with success. Im only doing it with pliers here for easier-precision.
1. Place the tip of your plier (or nails/finger) in the middle of your paperclip.
2. With your other thumb and index finger, push the two sides up.
3. Make sure they're twisted in a way where the excess are bent down on the same side.
4. Slide it on your stack of papers! You can also use it for a book depending on how big your paperclip is.
That the April Glambag is coming up! (I'm sorry, I'll post reviews of the March Glambag soon when I get time to transfer pictures!)
For those of you who don't know, Youtube beauty gurus, such as Michelle Phan, Andreaschoice, and more have this company called MyGlam which sends you periodic professional makeup in the mail for only $10 a month. Sounds similar to Birchbox, but this company also gives you some full sized (along with deluxe sized) products.
I was pretty disappointed really with the last few Glambags, as I signed up for makeup and not skin care (still good to use, but I wanted makeup!). Tons of people complained about this, so the glambag girls finally decided to comply with some more girly makeup items in our glambag.
Every month they release sneak peaks slowly, but surely to get people excited and thinking about the bag they purchased. They already let out 2 sneak peeks for April's bag through Facebook, and I'm already sort of excited for the products!!
Sneak Peek #1:
What the facebook caption said:
"April Glam Bag Sneak Peek #1: It will be more than just black for your Glam Bags this month."
- April Lederman
This one got me super excited! It's no doubt the Urban Decay 24/7 pencil. I've heard it's really creamy and smooth and I'm stoked to try it out. If I'm sure, this originally came with the NAKED palette, but I was not able to get it as they replaced the pencil with a brush to lower costs.
Sneak Peek #2:
What the facebook caption said:
"Sneak peek #2: Adding a little extra drama to your Girls Night Out."
Another one that I'm happy with. I've never tried fake lashes before, so this is definitely something that I'd love to try out. Fake lashes give such a beautiful fullness and definition on peoples eyelashes - it really completes a look in my opinion better than mascara (although I never got to try them). I just hope they send glue with because I'm too lazy to willingly bring myself to a store to buy some hahah. :)
They also said this in a different area:
"Stay tuned as we roll out more tools to store in your case!"
This kind of got me excited. In March's Glambag, we were send a pretty pink case and a crease brush (although it was more like a fluffy blending brush with the size and all). The only drawback was that it had a horrible smell to it (don't know how to describe) that even other glammies hated. Some even threw the case out! According to this quote, it seems like they're hinting that they're going to be giving other different kinds of brushes to add to the set. The funny part is that the case is quite small and would most probably not even fit the other brushes unless they were like angled brushes or something!
Soo are you all subscribed to MyGlam? Or are you subscribed to any other subscription makeup companies like this? What do you think of this April Glambag? For those of you who de-subscribed, would you think about subscrbing again?