Showing posts with label cute. Show all posts

Thursday, August 2, 2012

Retro Patriotic Starburst Nails Tutorial

I hope you all had a wonderful 4th of July - even if this post is almost a month late! 


Next time you do something patriotic (or you just want to cheer on the U.S. for the Olympics Games!), try out this simple manicure. 
I think it would be better if the starburst lines were coming from a different direction, but these still look interesting nonetheless.

Instructions:
1. Paint on your nails a white base to represent the white stripes in the American flag. 
2. Using a sponge, sponge on some yellow to make the white look aged. If you have a more "cream" colored white, you can use that and skip this step!
3. Cut some diagonal stripes out of tape. Don't make enough for each stripe on every nail, as you can reuse the tape a couple of times. 
4. Place around 3 diagonal strips of tape on your nail and press down to ensure they're secure. 
5. Sponge red polish onto 3 out of 4 spots available to paint. Leave one of the two middle ones bare. 
6. On the last one, sponge on a dark navy blue. Use a small sponge for precise application, but still ensure that it's slightly messy and gives a sponged effect. That's what makes it look all cool and retro! 
7. Then, put some fine or even chunky glitter on the blue stripes to mimic the stars in the flag. I used more chunky glitter that I stuck on with some top coat. 
8. Lastly, add your top coat to finish off your design and make it chip-proof! 

And that's it! Hope you liked this fun nail art tutorial. 
-H. <3 

Sophisticated Bow Nails


There's something I really like about the base color of this design. It's such a simple, yet glamourous pink color- almost nude, but not. I originally only had this color on without any nail art, but when it started chipping at the tips, I decided to cover it up with a design. 

All I did was cover the chipped areas with the black polish as a french tip and on the accent finger, I painted a bow. Later on, I did add a black tip to the accent finger because my OCD was bothered by the fact that I didn't have it there, but I did on all the other nails. 

Nail Polishes Used:
Essie - Lady Like
Sally Hansen - Black Heart
Avon - Blossom

Are there any nail designs that you're loving lately? Show me or write a comment down below! <3 I'd love to see. :) 

-H. <3 

Thursday, July 12, 2012

Helloberry Jewelry

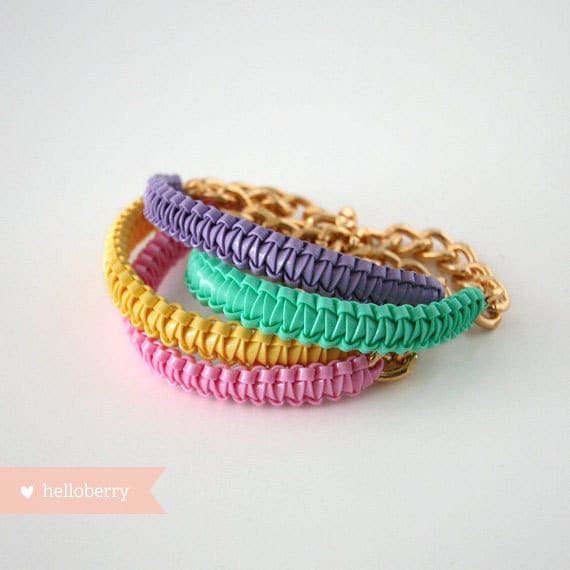
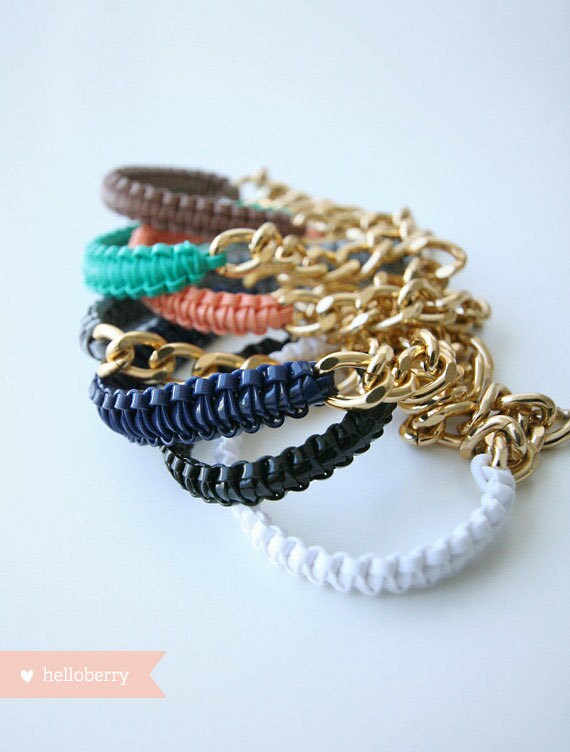
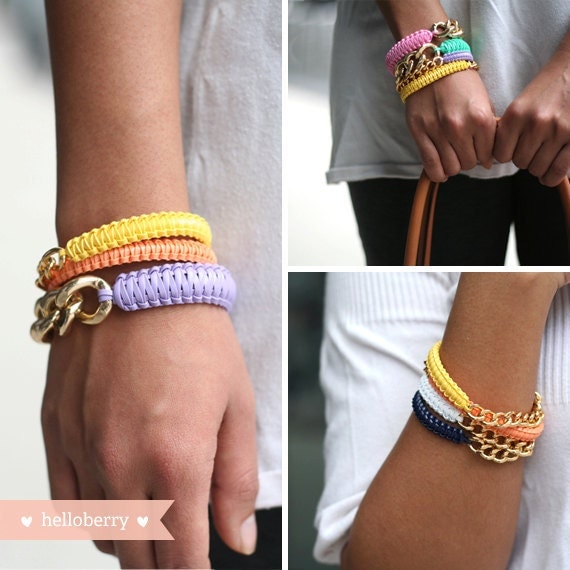
So for a while I've been seeing some bracelets by Helloberry featured on ThatsHeart's Instagram and Youtube. I've been seeing these styles of bracelets worn on SO many people lately. I don't blame them though- they're super cute.

Aren't they adorable? I love the huge chain attached to it. I probably wouldn't pay $15 for this though- I'd rather make it for around $3-4 max with the extra time on my hand and some jewelry/craft materials. What can I say- I'm a DIY person with little cash to splurge. 


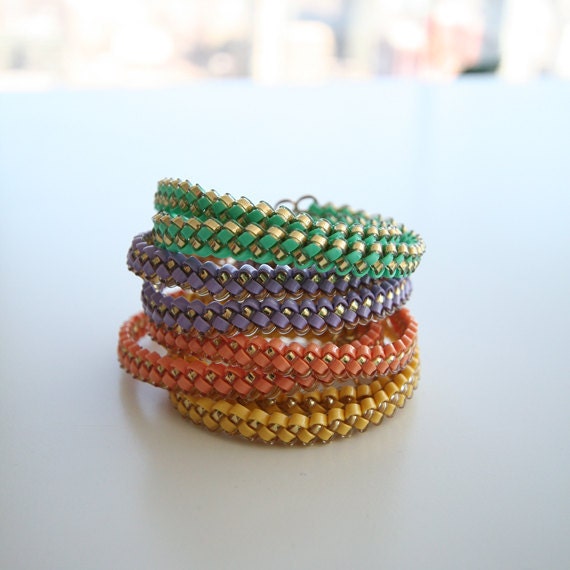
Here's another type of bracelet made by them. I believe the lanyard is wrapped around a ball chain for this.

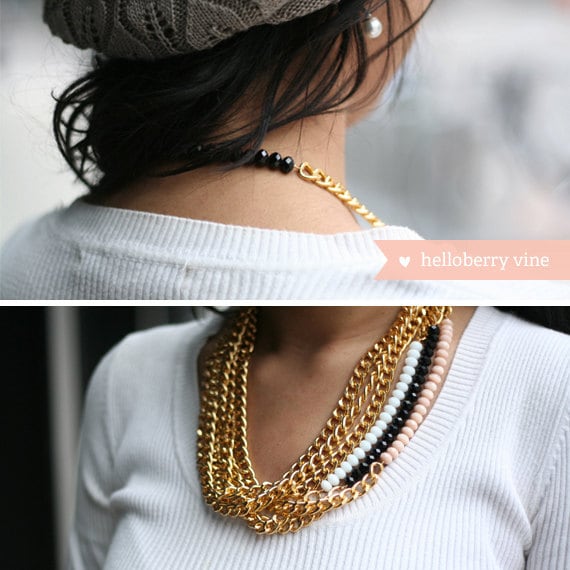
And lastly, one of my favorites - the Helloberry Vine necklace. The ones pictured in this is actually 3 stacked together. Normally, it is just one super long and thick chain with one row of colored beads. Each color has a unique name to them- like the navy blue one is named Katy and the light Parisian pink is named Emmeline. I really do love this one and want to try it out soon. It's so simple to make that I might even make a quick tutorial on it on the blog! 
Gosh, i want it so bad, but I can't afford to pay $28 for it. :3 

That's all for now - I was planning on uploading a huge haul post, but all the pictures are on my mom's laptop! :(
Till next time, 
-H. 

Tuesday, April 24, 2012

Express Scarves - Sale

Just surfing around Express and found these scarves. Aren't they cute? The first one has a leopard print and the other has an ombre purple/pink design to it. Both are infinity scarves, so they're super easy to just sling around your neck when you walk out of the door. Perfect for the colder seasons of fall, winter, and early spring. 
Since Spring is almost at its end, I'm hoping these scarves go on sale sometime soon. I've been eyeing them for a couple of months now. 
Either that, or I'll just but a cheaper infinity scarf. The only reason why I want the Express ones so much is because I heard these scarves have such great quality. I have at least 5 friends that have the leopard print scarf that recommend it and they've had the scarf for a long time. 
The sale they have on right now is pretty great, considering the original prices. Still, I don't feel comfortable fishing out $45 at once (this is where my desi-frugalness kicks in). 
Any scarves you've been eyeing? 
-H ♥

Sunday, April 22, 2012

Rose Garden Nails

Here is a nail design that I did recently. I was just in a super stressed mood Friday and wanted to relax by putting some polish on. After playing around I created this cute design that features roses and buds. My top coat ran out, so I just used a coat of clear polish that has glitter in it. Hoping to buy some Seche Vite soon (and no, I don't believe it will cause birth defects - that's just what the state of California puts on all their labels that have even the smallest trace of lead. In fact, even Starbucks products have that label- What's your take on that?).

I did this design with:
Sinful Colors - Happy Ending
Zoya - Juicy (what I'm holding in the picture)
A pink glitter polish (Sinful Colors, but I forgot the name)
Black Heart (880) - Sally Hansen (to mix with the green to create some shading on the leaves and stem)
White Creme - Wet n' Wild
Kaleidoscope - Wet n' Wild - Wet n' Wild
And a bright pink color to alternate with the Zoya - Juicy polish by Pure Ice

If you're interested in knowing what the other names are of the polishes I didn't remember, please don't hesitate to ask.

Wednesday, April 11, 2012

Eclectic and Cute Mix from Urban Outfitters!

So I found a couple of cute clothing websites today while surging through the web. This one was probably the most well-known out of the bunch, and I knew that there's probably an Urban Outfitters near my home.
I never thought about going to Urban Outfitters - when I thought about it, I always felt that it was a little too hipster for me. Even though I had to pick and choose on that blog, I still really adore the things I found. 
I'll start off with the more eclectic and unique things that I thought were pretty cool! :) I'd totally impulsively buy them. Be forewarned, my friends. 
By the way, I'd just like to tell you how cute the website is. The design is very edgy, yet simple. Love it! 

Oh and I tried to find things overall within a certain price range for those who don't want to spend too much. I'll update this post soon with a link and price!
  • I thought this was pretty clever, considering you just clip a bow on your hair! Probably won't work for a girl who has hair texture like me, but for girls that don't have frizz, it'd be pretty cool and practical. 
  • The bag at the top right corner is very unique. The fact that it looks like a tux with pink details makes it so cute and eclectic. 
  • The lace fan... *swoon*. It looks so pretty! Someone tell me that these aren't really cute and possibly seductive. I dare you. 
  • DO YOU BELIEVE THIS IS LIPSTICK?! I find it so funny/cute that there's a little cat on the end! The color is pretty, too. However, I don't see myself ever using this baby- I don't wear lipstick anyways and would hate to ruin the cute cat! And it'd probably be a bit hard and uncomfortable to apply with the ears and all. 


  • I've been meaning to get a pair of everyday studs. I'm not really a pearl person so I don't wear the ones I have much. Although I'd love to have some (faux even) diamond studs, I thought these were pretty cute too. I'd totally wear the hear or stars ones everyday, and can see myself using the moon and stars together while mix-matching. 
  • I think these feather earrings are pretty and sophisticated. Don't know if they'd suit me well enough, though!
  • The last two pictures are of the same things. I love the threaded bracelets - the color combinations are a little out there, but I still think they're pretty cute! And they give 6 other gold bracelets as well. 


  • I've been wanting a watch for a while- specifically the Michael Kors watch that I have a picture of on the bottom right. Isn't it beautiful? I think it'd go with a lot of outfits because of the rose-gold color. The name is Michael Kors Rose-Gold Baguette watch, but it's so expensive! I'd never get my hands on a $300 watch like that. 
  • So I started looking for some alternatives and found a couple of watches on Urban Outfitters. I thought the mustache one was pretty unique and cute! It's a bit simple though for my taste, but nice nonetheless. :) 
  • There was also this typewriter-style watch. It can come in a variety of letters. If I were to get it, I'd get 'h' of course. :) It's also a bit simple like the mustache watch. 
  • The next two are the same types of watches, but different colors. The floral design adds a cute feminine touch! 
  • The next one is the one im COMPLETELY IN LOVE WITH. It was originally priced $50 but only online its $15. It comes with two bands- the white and blue, and has 3 beveled edges. The two on the bottom right of the picture seem to have some rhinestone border, while the other one on the watch has a nice design. I want this so bad!! 


  • I've always wanted a beanie. They seem so effortless and cute. They could also hide up some strands of hair that I'd get frustrated with when I try to keep my hair down. I like this color, but I have nothing for it to go with. I'd probably choose a light brown or creme color instead. :). I found out how to sew these together too, so I might do a tutorial for a pink one (it's refashioning out of an old sweater!). 
  • These umbrellas come in a variety of trims. I chose blue here to make it clear how the trims look. I'd probably get a white trim or maybe even this one (depends) and decorate the inside with cute drawings by a sharpie marker. The sharpie wouldn't fade off especially since there's no water hitting it- it's a cute idea. :)

And that's it from what I found to like on Urban Outfitters! I'm sure I could look into clothing and other accessories, but it became a bit time consuming. Have you every shopped at Urban Outfitters? What'd you get and how do you like the store? :)
-Huma 
XO

Friday, April 6, 2012

DIY: Cute Heart-Shaped Paperclip

Hey guys!
So here's a super easy DIY that I know all my girlies will love. Instead of purchasing already-made, more expensive heart paperclips, why not make it at home in a matter of seconds?
So here's what you need: A paperclip and a long-nosed plier. You don't need a paperclip that large or colorful either. You also don't have to have a long-nosed plier. I've done it with my nails/finger plenty of times with success. Im only doing it with pliers here for easier-precision.
1. Place the tip of your plier (or nails/finger) in the middle of your paperclip.
2. With your other thumb and index finger, push the two sides up.
3. Make sure they're twisted in a way where the excess are bent down on the same side.
4. Slide it on your stack of papers! You can also use it for a book depending on how big your paperclip is.

Hope you liked the little tutorial!
XO

Tuesday, March 27, 2012

Hearts/Valentine's Day Nails Tutorial

This video was made a while ago, but I thought I'd share it with you all. It was for Valentine's Day- a cute design containing tons of hearts. I actually found out the trick of creating the heart through bubzbeauty on Youtube. She was drawing bumble bees from Winnie the Pooh and created dashed lines. She gave the idea to her viewers to use a bent toothpick to create the lines, but I thought they were better suited to create hearts and flowers because of the teardrop shape. 
Hope you all try this design! If you do, please share a picture. I'd be really happy to see one. :)
XO

Items Used:
Toothpick
Sinful Colors - Soul Mate
Avon - Blossom 

Spring Flower Nails Tutorial


1. Paint your nails a creamy purple color besides your ring finger. Here I'm using Tutu Cute by Ulta (and you have to admit that the name itself is too too cute!).
2. Now use a white polish to paint your ring finger. The one I used was Wet n' Wild's French Creme.
3. Here are the things you'll need for this nail design. Instead of a brush you can use a bobby pin or pen for the flowers and a toothpick for details.
4. Create messy dots to represent the flowers on the white base of the ring finger.

5. Now mix the purple with the white polish to create a light purple used for detailing.
6. Draw a swirly design within the flowers, like in the picture.
7. Now take out your green polish and draw 2-3 leaves around the flowers.
8. And lastly, set your design with a shiny topcoat.
Remember that this design can also be done with toothpicks and bobby pins, so don't be bummed by seeing the brush.
Also, play around with it- do the springy flowers on all your nails or on your toes, or even have a different color scheme.
Hope you all try it out! I'd love to see a picture.
XO

Monday, March 26, 2012

Tuxedo Nails Tutorial

A while ago I decided to try out these cute tuxedo nails. 
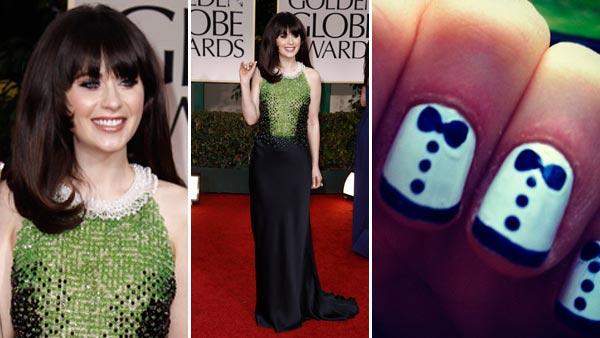
They were inspired by Zooey Deschanel in this year's Golden Globes. She actually tweeted about them, so the picture on the far right of the photoset underneath is one that she took of her nails. 
Zooey Deschanel is such a cute and quirky actor. I love watching her in movies or in her show, New Girl. (I have to catch up on it, though.)
So my nails are pretty similar, but I decided to go with just a very, very small black tip instead of the normal black french tip that she's sporting. I wanted more space for the bow and the buttons. :)
Here's a little tutorial on how to have quick and easy nails like her:
1. Start of with a white base. Here I am using a Wet n' Wild white creme color. 
2. Since I couldn't find my brushes, I decided to use both a pen and a pencil. I still need to search for those. Both of these are good alternatives too if you do not own a brush/dotting tool. In the picture, I added a blob of black polish on a post-it note to use in my nail art. 
3. Create a bow using your lead pencil. It's fairly easy- just connect two triangles together. 
4. Line the outer edge of your nail with black polish on the tip of your lead pencil. If you want a thicker tip, I suggest using a steady hand to glide the black across. Make sure while you are doing this to move your finger in the direction you want, rather than the nail polish brush- this makes it an easy application. If you're not able to do this, try a nail art pen. 
5. Make three dots with a pen. The reason why we use a pen in this rather than the lead pencil is that the pen has a thicker tip, making the dots a larger size. 
6. Not pictured, but protect your design and give it some shine with a good top coat.
And wala! Here are your fancy, schamncy tuxedo nails. You'll look spiffy all over town. :) Hope this helped!